/** Micro Soft clarity */ Learn Shirshasana - headstand with Shyambhai Yoga

Learn Shirsihasana Head Stand with Shyambhai Yoga in 45 - 90 days

Yes! You can also do it! Enroll now and we will ensure that we share all the tips and tricks of how you can acheive Head Stand Goal. Start your journey to Fitness with us today and practise advanced asanas safely and effectively

Shirshasana Live Session

If you are interested in learning how to do Shirshasana (headstand) and want to benefit from the guidance and support of an experienced yoga teacher, then join our live class today!

1. Schedule: 10 am, Monday to Friday

2. Duration: 1320+ minutes of live and guided sessions with Shyambhai Yoga Team

3. Mode: On Zoom

4. Cost – Rs. 3500/- per month
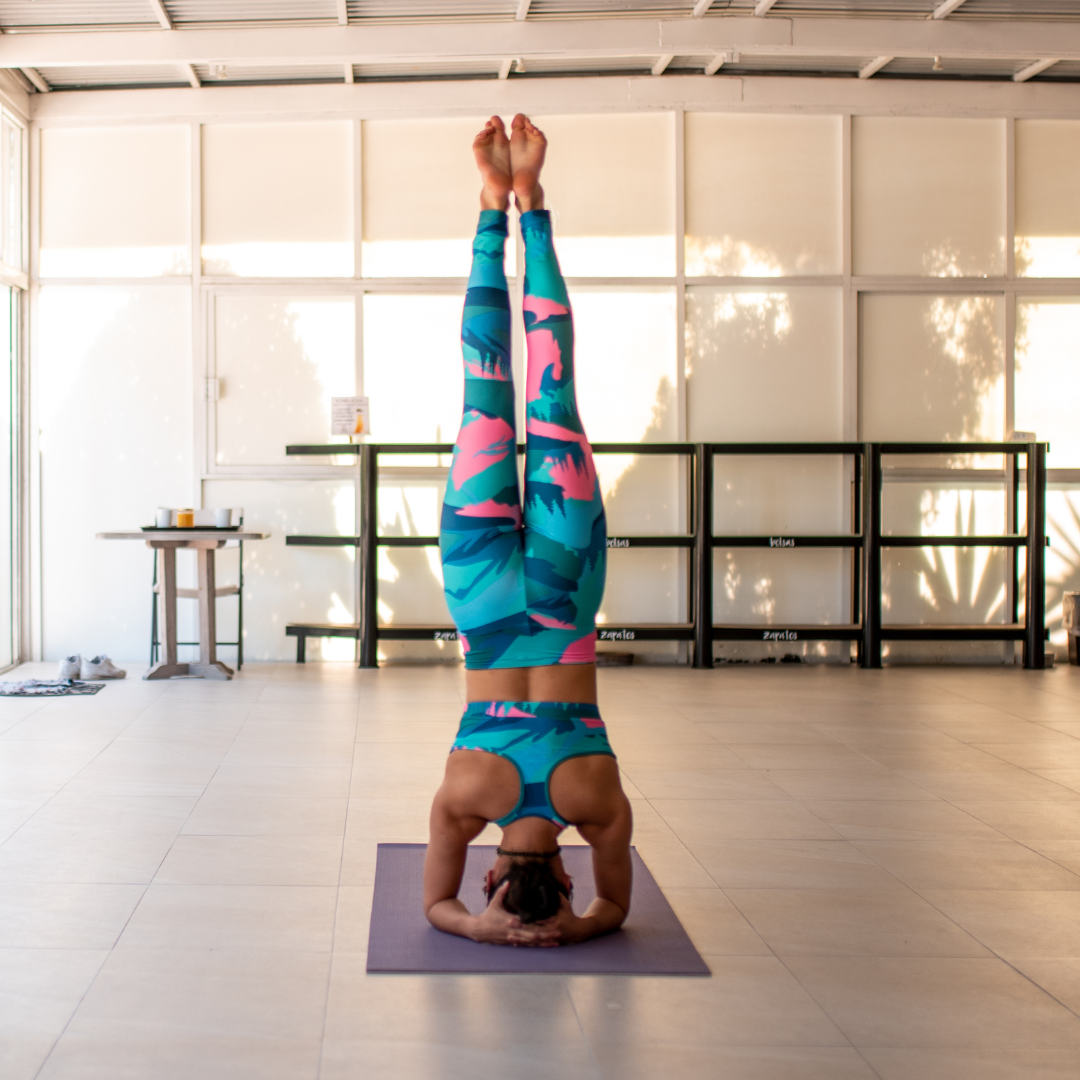
Shirshasana

Learn Headstand (Shirshasana Yoga) In 45 – 90 Days

This is exactly how we teach you Shirshasana (Headstand) in 10 STEPS over a Zoom Live Class:

Step 1: Warm-up Before attempting Shirshasana steps, it’s important to warm up your neck, shoulders, and core muscles. You can do some simple stretching exercises or a few rounds of Sun Salutations to get your body ready for the pose.

Step 2: Come onto your knees Start on your hands and knees, with your wrists directly under your shoulders and your knees under your hips. Your arms should be straight and your fingers spread wide.
Step 3: Interlace your fingers Interlace your fingers, with your palms facing down. Place your forearms on the ground, keeping your elbows shoulder-width apart.
Step 4: Place your head on the ground Place the crown of your head on the ground between your interlaced fingers. Your forehead should be touching your hands.
Step 5: Lift your hips Slowly lift your hips up towards the ceiling, straightening your legs as you go. Keep your arms and hands in position, and make sure your weight is evenly distributed.
Step 6: Walk your feet in Walk your feet in towards your body, bringing your hips over your shoulders. Keep your legs straight and engage your core muscles.
Step 7: Lift one leg Lift one leg up towards the ceiling, keeping it straight. Your other leg should still be firmly planted on the ground.
Step 8: Lift the other leg Once you feel stable with one leg lifted, lift the other leg up towards the ceiling. Keep both legs straight and engaged.
Step 9: Find your balance Once both legs are lifted, find your balance by engaging your core muscles and using your fingers and forearms to support your weight. Keep your gaze focused on a point between your hands.
Step 10: Hold the pose Stay in Shirshasana for a few breaths, or as long as you feel comfortable. To come out of the pose, lower one leg at a time and come back down onto your hands and knees.

Remember to always listen to your body, and never force yourself into a pose that doesn’t feel right. If you’re new to Shirshasana, it’s a good idea to practice with a qualified yoga teacher or instructor who can help you with alignment and provide guidance on how to safely enter and exit the pose.

To book your spot in our live online yoga classes, click the Book Now button below . We look forward to seeing you on the mat!